Cloudflare management
With a Cloudflare token, publish, protect and monitor your domains through Cloudflare, and manage DNS records, email records and the proxy from the panel.
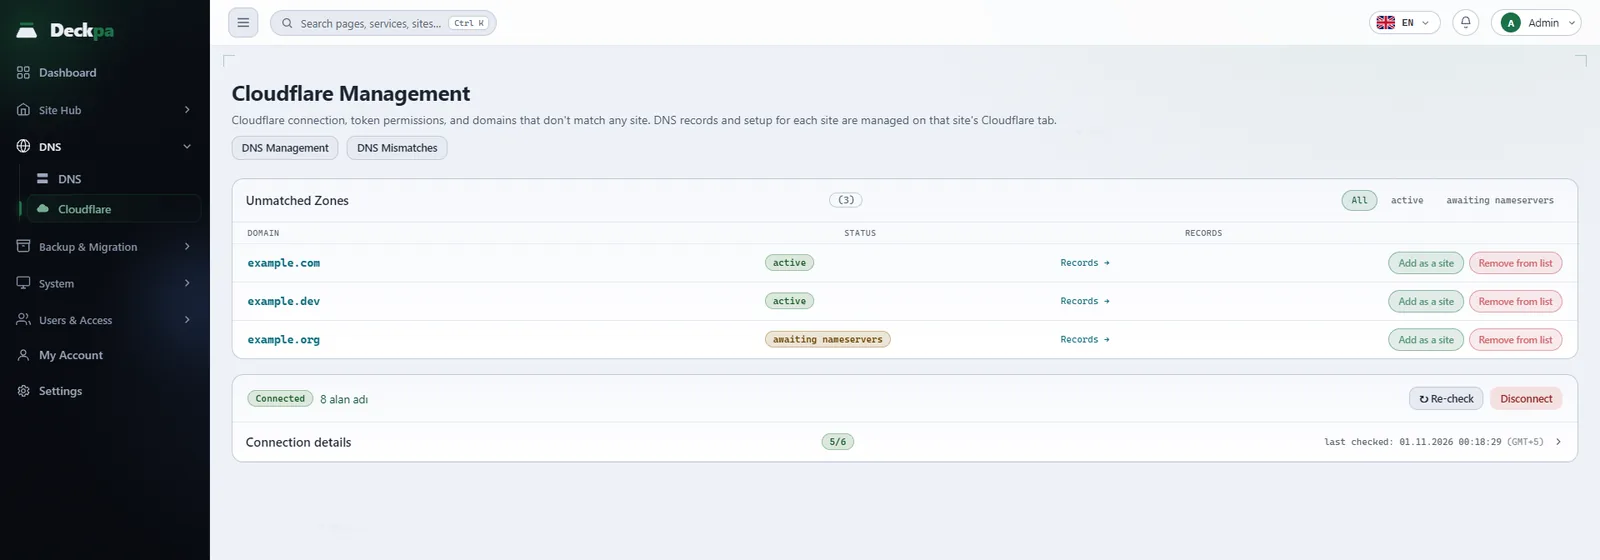
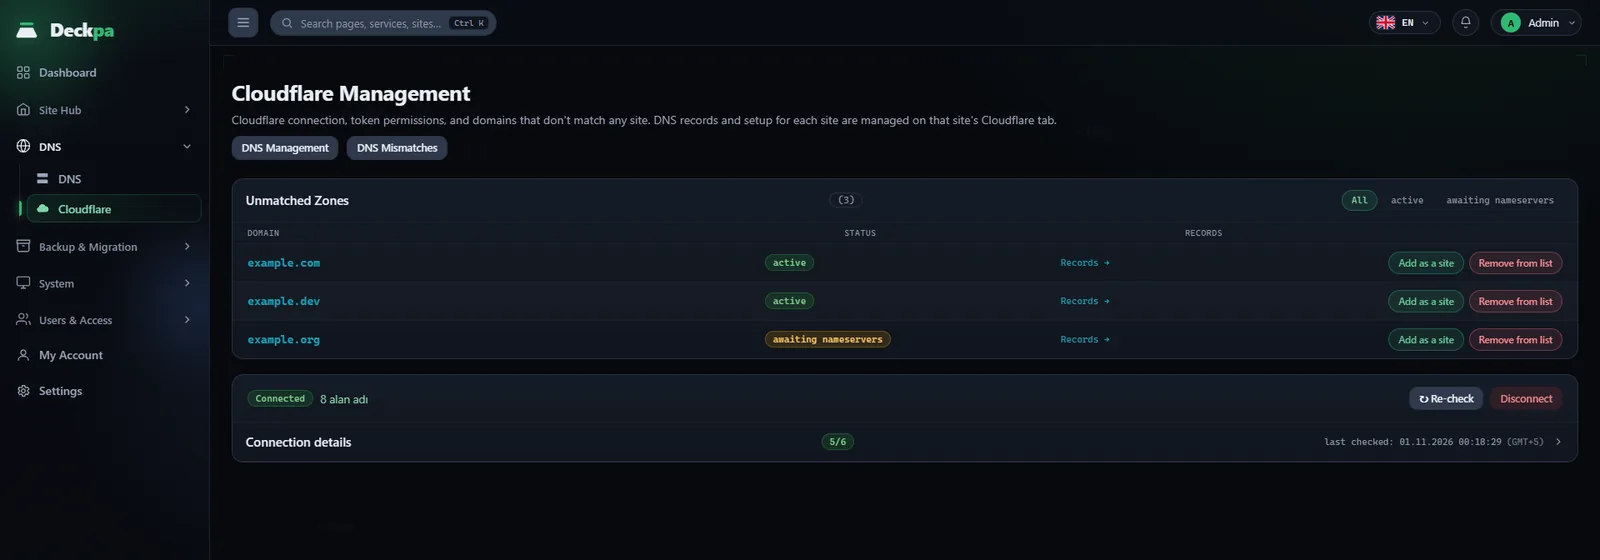
Where Cloudflare is in the panel
Deckpa connects to your Cloudflare account with an API token, and lets you publish, protect and monitor your domains through Cloudflare from the panel. Using Cloudflare is not required; you can keep your records on the panel's own DNS server or with an external provider (see DNS management).
Cloudflare appears in two places:
- DNS → Cloudflare (Cloudflare Management) — the account connection, the token permissions and the domains that are not matched to any site yet. The top of the page has DNS Management and DNS Mismatches buttons. Only administrators see it; the first administrator account connects its own Cloudflare token here.
- Site Hub → [site] → Cloudflare — the setup, email records, security, cache and traffic of a site. The tabs, in order, are Setup, Email, Security, Cache and Traffic. Each site owner connects the token of their own Cloudflare account from the site's tab; a site owner's token is private to them, while the panel's own address (certificate, tunnel) uses the first administrator's token. A site's Cloudflare connection belongs to its owner, and nobody else can see or manage it.
A site's records are also listed on the site's DNS tab (see DNS records and proxy below). To serve the panel's own address through Cloudflare, see Cloudflare Tunnel.
Connecting a token
Deckpa does not ask for Cloudflare's Global API Key. That key has authority over your whole account, all of your domains and billing, and its scope cannot be narrowed. Deckpa uses a token that has only the permissions it needs, and you can revoke it from Cloudflare with one click at any time.
- Create a token on Cloudflare — the Create token on Cloudflare button opens Cloudflare's token form with the required permissions already selected. You do not need to select any checkbox; you only press the Create Token button.
- Paste the token — paste it into the Cloudflare API token field and press Connect Cloudflare. The token is stored on the server so that only the authorized account can read it, and it is never shown in the panel again.
After the connection, a Token permissions table appears in the Connection details section. For each permission it says "granted", "missing" or "not checked", and if it is missing it says which feature stays off:
Zone:Read— listing your domains. Without it, no domain is visible.DNS:Edit— creating records such as A, MX and TXT. Without it, records cannot be added.Zone:EditandAccount:Read— adding a new domain from the panel. Without them, the setup wizard is off.Zone Settings:Edit— the SSL/TLS mode and the Always Use HTTPS setting. Without it, the SSL step is off.WAF:Edit— blocking by country (Security tab). Without it, country blocking is off.Cloudflare Tunnel:Edit— the panel access tunnel (Settings → Panel Access). Without it, the tunnel cannot be set up.
Some permissions can only be measured on a domain. If your account has no domain yet, these permissions show as "not checked"; this is not a missing permission and it blocks no action. They are checked automatically once you add your first domain. During the permission check, a temporary tunnel named deckpa-permission-probe is created in your account for a short time and then deleted.
If the token works but a permission is missing, the page tells you. A token cannot widen its own permissions; Cloudflare blocks that on purpose for security. Add the missing permission by editing the token in the Cloudflare dashboard, or use the Recreate the token with all permissions button to create a new token with the permissions selected and paste it. Editing does not change the token's value; you do not need to paste it into the panel again. If the new token is valid, it replaces the old one, and your account selection and the domains you hid are kept.
Other details:
- Checking the connection — the state shows as Connected or Connection invalid. Re-check validates the token right away. If Cloudflare has rejected the token, the permission rows cannot be measured; that is not a missing permission, and you need a new token. If the last automatic check failed, the page says the permission table may be out of date and gives the reason.
- Disconnect — records stay in Cloudflare; only the panel's access stops.
- Optional hardening — if you add a client IP filter to the token in Cloudflare, the token can be used only from this server. The page writes the address Cloudflare sees your server as; use that address, not the server's own network address. If the server's public IP changes, the token stops working. If you give the token an expiry date, the panel warns you on this page 14 days before it ends; after the date passes, the page says DNS operations are not working.
Unmatched zones and account selection
The Unmatched Zones list on the DNS → Cloudflare page shows domains that exist in the Cloudflare account but have no matching site in the panel. Each row shows the domain, its state (active or awaiting nameservers) and three actions. You can filter the list by All, active and awaiting nameservers. If every domain in the account is matched to a site, the page says so.
- Records — lists the domain's raw DNS records in Cloudflare (type, name, content, TTL, proxy). The delete button on each row asks for confirmation and deletes the record from Cloudflare.
- Add as a site — opens the new site form with the domain filled in. To connect the domain to a site, use the setup wizard on the site's Cloudflare tab, so that the zone, nameservers, A records and SSL are done in the right order.
- Remove from list — hides the domain from this list only and deletes nothing in Cloudflare.
Several accounts. If the token can see more than one Cloudflare account, the panel does not choose one for itself. Accounts other than the ones you choose in the Visible accounts list in the Cloudflare accounts section do not appear in the unmatched domains list and cannot be added as a site; at least one account must stay selected. When a site owner sets a site up on Cloudflare and the token can see more than one account, the page asks Which Cloudflare account should this be added to?; the choice is saved and not asked again.
DNS records and proxy
A site's DNS records are kept on the site's DNS tab (or the DNS Management page). If the site is connected to Cloudflare, the same records are updated in Cloudflare automatically. On sites connected to Cloudflare, A, AAAA, CNAME, MX and TXT records are managed; the SRV, CAA and NS types can be added only on sites whose DNS is on the panel's own server.
- Proxy per record — only on A,
AAAAand CNAME records, the badge in the Proxy column can be clicked to switch it (Proxied / DNS only). Other types show a dash in the column. While the proxy is on, the record's TTL field is locked and set to Auto. - Why the proxy may start off — the panel creates a record with the proxy off by default when: the name looks like one used for mail or file transfer (
mail,smtp,imap,webmail,ftpand similar); the name looks like a nameserver name; the site has no SSL certificate yet; the name is not tied to a site or subdomain on this server; the record does not point to this server; the name is two or more levels below the domain (Cloudflare's free SSL certificate covers only the domain and names one level below it); or the account has no active Cloudflare zone. Each record carries a note that explains the reason. - Proxy warnings — when you turn the proxy on, the form shows a warning if the name starts with
mail,smtp,imap,poporautodiscover, starts withssh,sftp,ftp,rdporvpn, or if the target points to another CDN or SaaS provider. The warning does not block; because Cloudflare carries only HTTP/HTTPS traffic, mail and similar connections can stop working. - Refresh from Cloudflare — reads the records from Cloudflare again. Sync works in both directions: it sends records that exist only on this server to Cloudflare, and brings records that exist only in Cloudflare to this server. The list marks records that exist on one side only with Cloudflare only or This server only.
- Conflict — means the same name and type holds different values in the two places. The top of the page says how many records conflict, the Conflicts button filters to just those, and hovering over the badge shows both values. Edit or delete one of the records.
- Changes that could not be sent to Cloudflare — when Cloudflare cannot be reached, the change you made stays current on this server and the page says how many changes were not sent. The hourly check retries them automatically; press Sync to retry right away.
- Records are not live warning — if the domain's nameservers do not point to this panel, the records stay in the panel but do not reach the internet; the page warns you about this.
- Panel tunnel record — while the Cloudflare Tunnel is on, the panel name's record shows locked with a Panel tunnel badge; it cannot be deleted or changed, and its proxy cannot be turned off. This record lives only in Cloudflare; it is not copied to the panel's DNS server and is not counted as a conflict during sync.
DNS mismatches
The DNS Mismatches button on the DNS → Cloudflare page lists inconsistencies between the panel and the real DNS state. It has two parts:
- Records that point to this server but have no matching panel entry — records whose name resolves to this server's IP address but has no site or subdomain in the panel. Each record states the reason (for example "No site or subdomain serves this name" or "Wildcard (*) record, but wildcard support is off for the site") and whether the record is in Cloudflare or PowerDNS. They may be left over from a deleted site. The panel does not delete them by itself, because pointing a name ahead of time for later use as a site is also a valid use. If a record is no longer needed, delete it on the DNS page; if you left it on purpose, close the warning with the Acknowledge button on its row. Acknowledged records stay in the Acknowledged records section and can be reopened with Warn again. Records you add from the panel's DNS pages are acknowledged automatically.
- Domains that could not be checked — domains whose records could not be read, so this check was not done; the "no mismatches" result does not apply to them. The reasons: the nameservers are on Cloudflare but the panel's token cannot access the domain (connect the Cloudflare account, or make the token cover the domain); it could not be determined which DNS is authoritative (check DNS resolution and internet access); the scan timed out (reload the page in a few minutes); the records could not be read (check that the DNS service is running and that the token is valid).
Setting a site up on Cloudflare
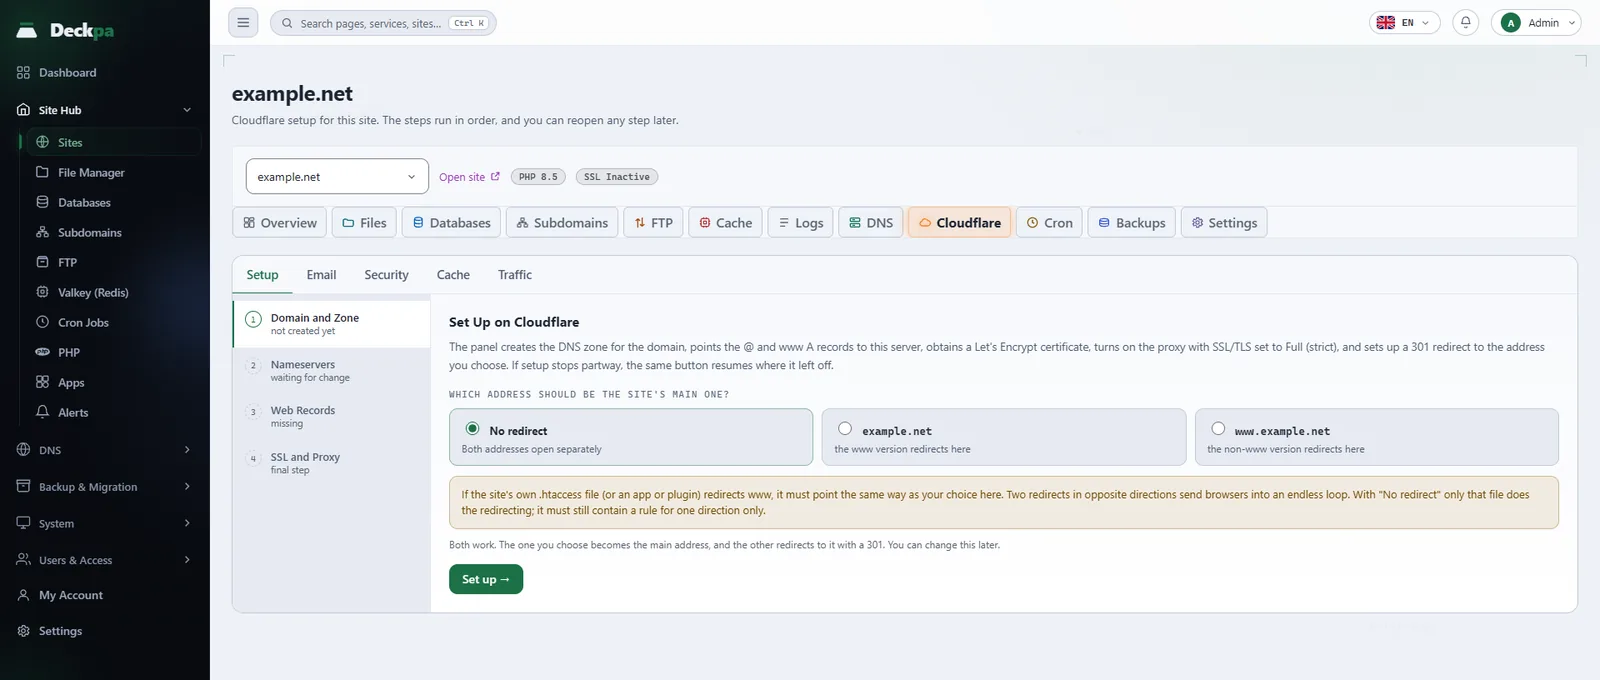
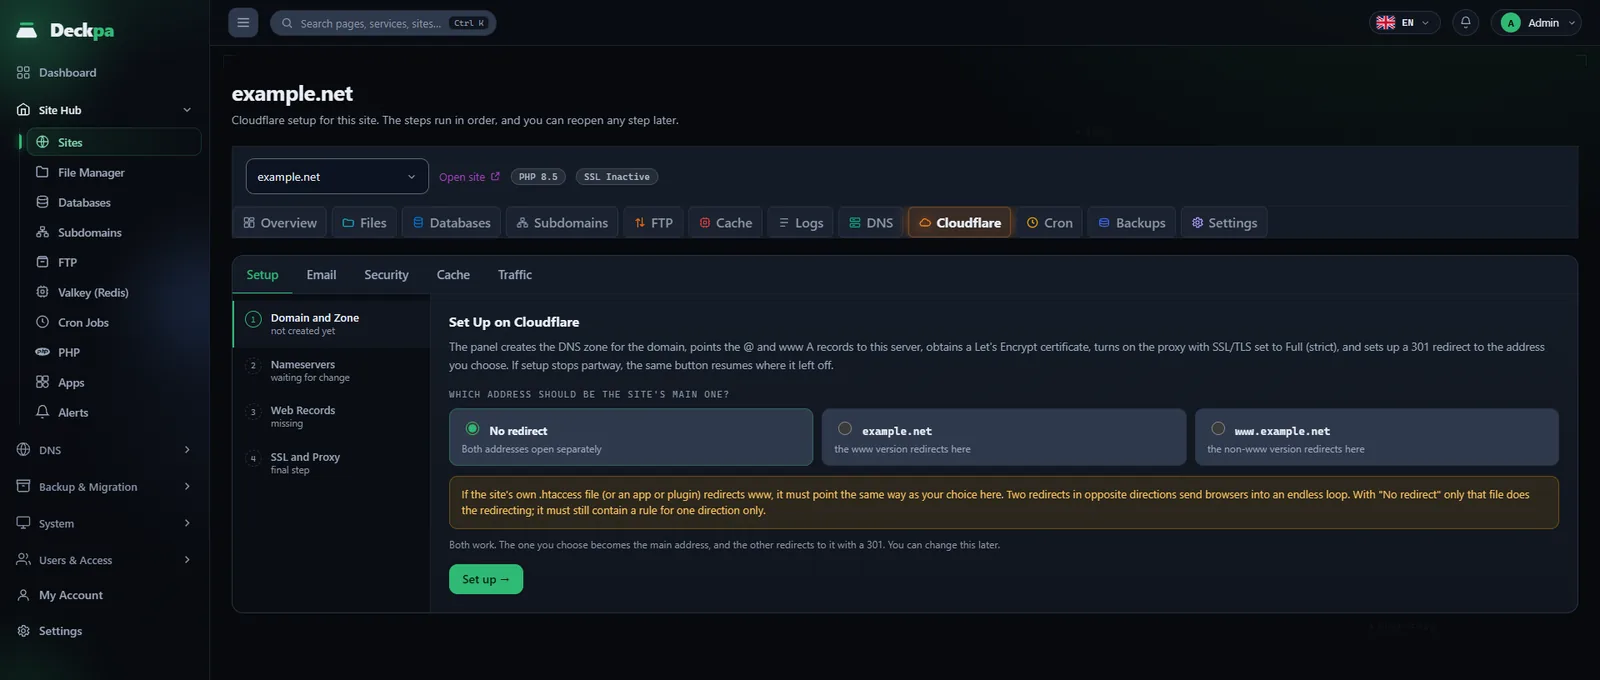
A site's Cloudflare → Setup tab is a wizard with four steps. If no token is connected, the tab first shows a Connect Cloudflare button. The Set up button applies the steps in order; if it stops halfway, the same button continues from where it stopped. A new setup cannot be started for a domain while one is still running.
- Domain and Zone — a DNS zone is created in Cloudflare for this domain. It also works if your domain is hosted somewhere else; your existing records are kept.
- Nameservers — this is the only task outside the panel: at the place where you bought the domain, replace the nameservers with the Cloudflare nameservers written on the page. The page also shows the domain's current nameservers and reports the change with a not changed yet or change detected badge. The panel sends Cloudflare a "check now" request every 5 minutes; the change usually shows up within a few minutes and you do not need to keep the page open. The Check now button sends the same request immediately without waiting. Until the change shows up, the zone stays awaiting nameservers. This stage also has a Delete zone button: it deletes the zone and all of the domain's DNS records in Cloudflare, and asks for confirmation. If other sites use the zone, the confirmation lists them.
- Web Records — once the nameservers are active, the panel opens a Before You Continue card that shows the records from the panel's own DNS server and those currently in Cloudflare. Nothing is touched until you press Continue: sync records and set up. When you continue, the A records for the domain and for
wwware pointed to this server's IP address. If a record in Cloudflare points to a different address than the server's IP, the card shows an IP differs warning, and if you continue that record is updated to this server. Records that are not of type A (a CNAME, for example) are not touched. The proxy is created off at this stage. - SSL and Proxy — one button (Set up SSL and turn on the proxy), with three operations behind it that cannot be reordered: a Let's Encrypt certificate is obtained on the server, then the proxy (orange cloud) is turned on and the SSL mode is set to Full (Strict), and last a 301 redirect to the address you chose is set up. If you skip this step, the site still works; only Cloudflare's protections stay off.
Why the order cannot be changed: if the proxy is on and the server has no valid certificate, Cloudflare returns a 525 or 526 error; if the SSL mode is set to Flexible, the site falls into an endless redirect loop. In both cases the site becomes completely unreachable and the visitor is not told why.
During setup you also choose the site's main address. There are three options: No redirect (both addresses open separately), the www version redirects here (the main address is the domain without www) and the non-www version redirects here (the main address is the one that starts with www). When you choose a redirect, the other address is redirected to the main one with a 301; you can change it later. If the site's own .htaccess file or an application has a www redirect, it must point the same way as the one you choose here; two redirects in opposite directions send the browser into an endless loop. If you choose No redirect, only that file does the redirecting, and it must still contain a rule for one direction only.
If a step fails, the reason is written on the page (for example Step 3 not completed: web records or Step 4 not completed: certificate could not be issued), and the panel retries it automatically in the background about every 15 minutes (up to 8 times). After repeated failures, automatic retries stop to protect the certificate provider's quota; after you remove the cause, you can retry by hand with the button. If Cloudflare is in full protection mode while the server has no certificate, the page shows a Protected by Cloudflare, but the certificate is missing warning; the Get certificate button obtains a real certificate on this server.
After setup is finished, you can change the HTTPS settings (Always Use HTTPS, Automatic HTTPS Rewrites) in the Site Settings section of the same tab. The View or edit DNS records link takes you to the site's records, and Refresh from Cloudflare queries Cloudflare again right away. Detach from Cloudflare turns the proxy off and removes all protection rules the panel added; your domain and DNS records are not deleted, and the site keeps working. After that, traffic comes straight to the server, your server's IP address becomes visible, and Cloudflare's attack protection and cache are no longer in effect. Rules you added yourself in the Cloudflare dashboard are not touched.
Email records
The Cloudflare → Email tab manages the domain's mail records; it writes DNS records only. If the domain has not been set up in Cloudflare, the tab says so and shows a Go to setup link.
- Email provider — you choose Google Workspace, Microsoft 365, Yandex 360 or Zoho Mail; Write records writes the MX and SPF records for you. For Microsoft 365, the MX address specific to your domain (it is in the "Domains" section of the Microsoft 365 admin center) goes into the MX host field; for other providers, leave that field empty. All existing MX records are deleted and the new ones are written, and the action asks for confirmation; if you pick the wrong provider, mail does not arrive.
- Email Health — shows the state of each of the MX, SPF and DMARC records as ok, missing or (for DMARC) monitoring only. Without MX, the domain cannot receive mail; without SPF, outgoing mail can be sent to the spam folder; without DMARC, forged mail can be sent in your domain's name.
- DMARC — you choose the policy that tells the receiving server what to do when verification fails:
none(monitor only),quarantine(send suspicious mail to the spam folder) orreject(refuse it). Start withnone; choosingrejectbefore SPF and DKIM are configured correctly can cause your own mail to be refused as well. Save DMARC updates the record.
Purging the cache
If a change you made does not show on the site, Cloudflare may still be serving the old copy. The Cloudflare → Cache tab has two options:
- Purge Everything — clears everything Cloudflare has stored for this domain. Use it if you do not know which content is outdated. The next visitors load pages from your server, so server load may briefly increase; the action asks for confirmation. Changes appear within seconds.
- Specific Addresses — clears the cache only for the addresses you write. This is enough if you updated a single page or image, and it puts less load on the server. Write one address per line; a path is enough (
/style.css); an address may start withhttp://orhttps://, but it must belong to this domain. Up to 30 addresses can be entered at a time. The panel has no purge by tag or prefix.
The Cache Behavior section below on the same tab has these settings: Brotli compression, Caching Level (Standard, No query string, Ignore query string), Development Mode and Always Online. While Development Mode is on, the cache is temporarily bypassed; it is for seeing changes immediately while you work on the site, and Cloudflare turns it off by itself after 3 hours. Changes take effect in Cloudflare immediately. If your Cloudflare plan does not include a setting, "not included in your plan" is written next to it. If you have no permission to make changes, the tab only shows the settings.
Access rules and country blocking
On the Cloudflare → Security tab, blocked visitors never reach your server, and attack traffic does not use your bandwidth either. At the top of the tab there is a summary showing the protection level, the minimum TLS version, the number of features and the number of access rules.
- Protection settings — Security Level (Essentially Off, Low, Medium, High, I'm under attack), Minimum TLS Version, Browser Integrity Check, Hotlink Protection and Email Address Obfuscation. A higher level blocks more attacks but also shows a challenge to some real visitors. In the I'm under attack mode every visitor sees a waiting screen for a few seconds before reaching the site; turn it off when the attack is over, or your site looks slow to all visitors. While the mode is on, a Turn off attack mode button appears at the top of the page.
- Access rules — for a single IP, an IP range or a Network (ASN) you choose an action: Block, Challenge, Browser check or Allow. An IP range accepts only
/16and/24for IPv4 and only/32,/48and/64for IPv6; a network number is written likeAS13335. If you like, you write why you added it in a note. Rules are applied from the narrowest match to the widest: an allow you give to a single IP comes before a rule that blocks that IP's network. A rule takes effect immediately; take care not to block your own IP: your access to the panel is not affected, but you cannot reach the site either. - Access by country — allows or blocks access by the country the visitor comes from. There are three options: Off (all visitors allowed), Block the selected countries and Allow only the selected countries. The policy is written as a single Cloudflare rule; at least one and up to 60 countries can be selected, and your own rules are not touched. The certificate validation path (
/.well-known/) is exempt in both options, or your certificate could not renew. In the allow option, verified bots such as Google and payment providers are exempt too. When you choose Allow only the selected countries, do not forget to add your own country to the list; the panel asks for confirmation before applying. This feature needs theWAF:Editpermission on the token; without it, a note about the missing permission appears instead of the section. - Ready-made policies — rules that are turned on and off with one click: WordPress login lock (asks visitors to
wp-login.phpand the admin area for a challenge;admin-ajax.php, which plugins use, is exempt) and Turn off XML-RPC (turns off WordPress's old remote access interface; leave it on if you use Jetpack or the WordPress mobile app). The badge shows how much of the free plan's custom rule limit you are using; Cloudflare allows 5 custom rules on the free plan. When the limit is reached, the panel says the rule limit has been reached and asks you to turn off a policy first. - Login page rate limit — a limit for
wp-login.phpthat you turn on and off. You choose the request threshold between 2 and 100; if the same visitor exceeds the threshold within 10 seconds, access to the login page is blocked. The block lasts 10 seconds. The period and the action are fixed; a rate limit cannot be put on the whole site or on another path.
The panel does not touch custom rules you added yourself in Cloudflare: for the country policy, the ready-made policies and the rate limit, the rules the panel writes are marked with a "deckpa" prefix in the description field, and the panel changes only those.
Traffic analytics
The Cloudflare → Traffic tab gives a summary of the last 30 days. There are four indicators: Requests, Served by Cloudflare (the share of requests served from the cache), Data transferred and Blocked requests. Next to each indicator is the direction of the second half of the period compared with the first half (as a percentage or in points). The chart below shows daily requests; the dark part is what was served from the cache.
The higher the share of requests served from the cache, the lower the load on your server; when deciding whether you need to scale up your server, look at this tab. If the Cloudflare proxy (orange cloud) is off, traffic does not pass through Cloudflare and no data appears here; turn the proxy on from the Setup tab. On the free plan, Cloudflare keeps this data for 30 days.
What is and is not supported
What you can do from the panel:
- Connect with an API token: the first administrator account for the panel's own address, each site owner for their own sites. A token form with the permissions preselected, and a permissions table.
- Choose visible accounts among several Cloudflare accounts; list unmatched domains, add them as sites, hide them from the list.
- Create and delete a Cloudflare DNS zone for a root domain; watch for the nameserver change.
- Add, edit and delete A,
AAAA, CNAME, MX and TXT records; per-record proxy for A,AAAAand CNAME; two-way sync and conflict display. - The four-step setup: web records, a Let's Encrypt certificate, the proxy, SSL mode Full (Strict), a 301 redirect for www; detach from Cloudflare.
- Always Use HTTPS, Automatic HTTPS Rewrites, minimum TLS version, Brotli, caching level, Development Mode, Always Online, security level, Browser Integrity Check, hotlink protection, email address obfuscation.
- Purge the cache entirely or for up to 30 addresses.
- Access rules for an IP, an IP range and a network (ASN); blocking or allowing by country; the WordPress login lock, turning off XML-RPC, the login page rate limit.
- MX, SPF and DMARC records (Google Workspace, Microsoft 365, Yandex 360, Zoho Mail).
- A traffic summary for the last 30 days.
- Cloudflare Tunnel for the panel's own address (Panel settings).
What the panel does not do:
- It does not connect with a Global API Key; it uses tokens only.
- It does not create a separate DNS zone for a subdomain; a zone is for a root domain only.
- It does not add SRV, CAA or NS records on sites connected to Cloudflare; those types exist only on sites whose DNS is on the panel's own server.
- It does not turn on the proxy for record types other than A,
AAAAand CNAME. - It does not touch custom rules you added yourself in the Cloudflare dashboard; it changes only the rules it marked with the "deckpa" prefix.
- Limits: at most 60 countries in the country policy, at most 30 addresses per purge, a rate limit only for
wp-login.php, and only/16and/24for IPv4 ranges. - Cloudflare Tunnel is only for the panel's own address; it does not publish your sites through a tunnel.
Common situations
- Connection invalid — Cloudflare rejected the token: it may have been revoked, deleted or expired. No permission can be measured; this is not a missing permission. Create a new token in Cloudflare and paste it; your account selection and hidden domains are kept.
- "missing" in the permissions table — for example "missing → records cannot be added", "missing → no domains appear", "missing → setup wizard disabled", "missing → SSL step disabled", "missing → country blocking off", "missing → tunnel cannot be set up". Add the missing permission to the token in Cloudflare; you do not need to paste the token again.
- A domain stays "awaiting nameservers" — the nameservers have not been changed yet at the place where you bought the domain, or the change has not propagated. Make sure you entered the Cloudflare nameservers shown on the page and press Check now. The panel also checks by itself every 5 minutes.
- "A Cloudflare DNS zone cannot be created for this domain" — the domain is a subdomain and your account does not have the root domain. See the note above.
- "This domain is not a separate DNS zone" — your account already has a zone that covers this domain. First add the covering domain to Deckpa as a site; the records are managed from there.
- When adding a record: "There is already a record with this name and type" — a record with the same name and type exists on this server or on the Cloudflare side. If it is on the Cloudflare side and not on this server, first press Sync to bring the two sides in line.
- "A CNAME record cannot coexist with other record types at the same name" — the DNS standard does not allow a CNAME and another type at the same name. Delete the conflicting record first.
- A "Conflict" badge on a record — the same record holds different values on this server and in Cloudflare. Find it with the Conflicts filter, then edit or delete one of them.
- "The server's public IP address could not be determined (... is a private address)" — the server is behind a private network address, so the A record cannot be written automatically. Add the record by hand on the DNS page.
- "The certificate could not be issued" — three common reasons at the SSL step: the domain does not resolve to this server (check the DNS record; the certificate is retried automatically); the domain's CAA record does not authorize Let's Encrypt; Let's Encrypt has reached its request limit for this domain (it is retried automatically once the limit resets).
- The site shows a 525 or 526 error after moving to Cloudflare — the proxy is on but the server has no valid certificate. Use the Get certificate button on the Setup tab. For details, see SSL certificates.
- "Cloudflare could not reach your server ... The proxy was turned off again" — Cloudflare could not reach the server when the proxy was turned on. The panel turns the proxy back off by itself and the site stays served directly from the server. Make sure port 443 is open to the internet and try again.
- "The rule limit has been reached" — the free plan's custom rule limit is full. Turn off a ready-made policy, the country policy or the rate limit first.
- "This address does not belong to this domain" or "At most 30 addresses can be purged at once" — in a cache purge you can write only addresses of this domain, and at most 30.
- "A Cloudflare setup is already in progress for this domain" — a new setup cannot start until the running one finishes. Wait for it to complete.
- You made a change in the Cloudflare dashboard but Deckpa shows the old state — Deckpa keeps Cloudflare reads in a cache for a short time. The Refresh from Cloudflare button on the Setup tab queries Cloudflare again right away.
- "Cloudflare connection lost" alert — the token may have been revoked, expired or blocked by the IP filter. See the state with Re-check. For the alert rule, see Alerts.